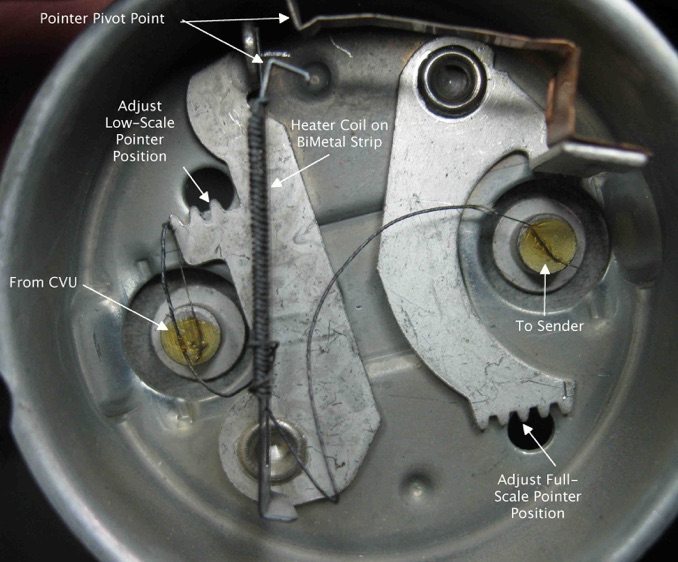
I had occasion to disassemble a couple of gauges and learned a little more about how they work
At the top of the gauge you can see a brass strip secured at the right with a hook in the left end. The pointer hangs in this hook. Just below the hook is another hook that engages in the pointer slot as it hangs on the brass strip. The second hook is the bimetallic strip that deflects when heated by the coil of wire wrapped around it.
I also discovered that the gauges have adjustment features incorporated in them. These are accessible from small holes in the rear of the gauge and can be used to adjust the maximum and minimum scale pointer deflections. For example, if your gauge reads under the “E” mark, you can adjust the left side of the gauge (right side as you view the rear of the gauge) so that the pointer is at the E marking on the gauge face. Similarly, if the gauge reads above the “F” mark on the gauge face, you can adjust the right side (left as you view the rear of the gauge) to move the pointer to the correct position when the sender reads “F” (10 ohms).